How to rig herring for chinook trolling
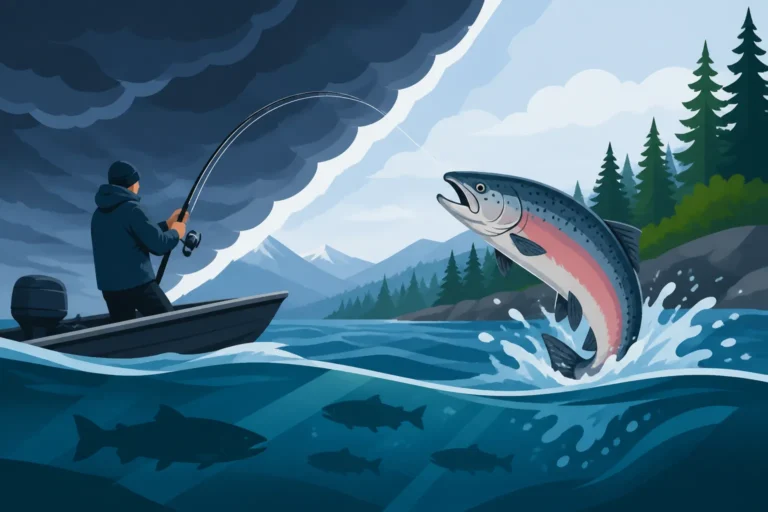
There’s nothing quite like the thrill of a chinook salmon hitting your line, especially when you know you’ve outsmarted them with a perfectly presented bait. But let's be honest, rigging herring for chinook trolling can feel like a dark art sometimes. One day it's a fish-catching machine, the next it's spinning like a washing machine agitator, and you're left wondering what went wrong. This guide is here to demystify the process, helping you master the art of rigging herring so you can confidently hit the British Columbia waters and increase your chances of landing that trophy chinook.
Why Herring is the Go-To Bait for Chinook Salmon
When you're out on the vast waters off British Columbia, especially when targeting those big, powerful chinook salmon, bait choice is everything. While there are many lures and artificial options available, experienced anglers time and again return to herring, and for very good reason. It’s not just a tradition; it's rooted in the fundamental feeding habits of these magnificent fish.
The Allure of Natural Prey
Chinook salmon, often called King salmon for their size and fighting prowess, are apex predators in the ocean. Their diet primarily consists of smaller baitfish, and herring are high on that menu. When a chinook sees a herring, it's not just food; it's a familiar, deeply ingrained instinct that kicks in. Think about it: a perfectly presented herring, complete with its natural scent, texture, and flash, mimics exactly what these salmon are programmed to hunt. An artificial lure might fool them sometimes, but nothing beats the real thing for consistent appeal. This natural connection is why understanding how to rig herring for chinook trolling is such a valuable skill for any BC angler.
Furthermore, herring emit natural oils and scents into the water that artificial baits simply can't replicate perfectly. These subtle cues travel through the water column, drawing in chinook from a distance, even in murky conditions. The scent trail acts as a powerful attractant, guiding the salmon directly to your offering. This is especially crucial in the vastness of the Pacific, where every advantage helps in bringing fish to your spread.
Mimicking the Real Thing
Beyond just scent and taste, the visual presentation of a herring is paramount. When properly rigged, a herring will swim with a natural, wounded baitfish action that is irresistible to a chinook. This isn't just a slight wobble; it's a distinct, enticing roll or darting motion that screams "easy meal" to a hungry salmon. The way light reflects off its scales as it rolls, combined with the subtle vibrations it creates, perfectly imitates a disoriented or injured fish, triggering a predatory strike.
Achieving this natural action is where the art of rigging comes into play. A poorly rigged herring will either spin erratically like a propeller, which is highly unnatural and off-putting to salmon, or it will swim dead, lacking any lifelike appeal. The goal is to create a seductive, natural roll or wobble that looks effortless and convincing. This specific presentation, combined with the genuine characteristics of the bait itself, makes herring an unparalleled choice for serious chinook anglers in places like the Campbell River Fishing Guide area or even off the coast of Vancouver Island.
Essential Gear for Herring Rigging
Before you can even think about getting that perfect roll, you need to make sure you have the right tools for the job. Having the proper gear makes the rigging process smoother, more efficient, and ultimately, more successful out on the water. Don’t skimp on these essentials, as they play a critical role in the final presentation of your bait.
Herring Helmets and Brine Kits
Herring helmets, often called "rotary heads" or "meat heads," are revolutionary tools for chinook trolling. These plastic or metal devices encase the head of your herring, providing a hydrodynamic shape that forces the bait to roll or swim in a specific, enticing manner. They come in various sizes, often corresponding to different herring sizes, and typically feature an adjustable fin or keel that allows you to fine-tune the bait’s action. Without a good helmet, achieving a consistent, natural roll can be incredibly challenging, especially at varying trolling speeds. Many anglers find great success with popular brands or even unbranded options readily available on marketplaces like Amazon.
Beyond the helmet, a quality brine kit or a good brining method is absolutely essential. Fresh herring, while soft, can quickly wash out and lose its scales or firm texture when trolled. Brining hardens the herring, toughens its skin, and helps it retain its natural juices and scent. A good brine mix usually contains salt, often non-iodized pickling salt, and sometimes curing agents or scents like aniseseed oil or commercially available fish attractants. Preparing your herring correctly with a brine is perhaps one of the most overlooked, yet critical, steps in ensuring your bait lasts longer and performs better in the water. It prevents your herring from becoming a "washer" – a bait that just spins wildly and inefficiently.
Rods, Reels, and Line Considerations
While not directly part of the herring rigging process itself, your rod, reel, and line setup are intrinsically linked to successful chinook trolling with herring. A good trolling rod for chinook typically ranges from 8 to 10 feet, with a moderate to moderate-fast action. This provides enough backbone to fight large chinook while offering a forgiving tip that absorbs the shock of a strike and keeps tension on the line, preventing hooks from pulling out. The rod holder should allow for smooth removal, as strikes can be sudden and powerful.
For reels, a levelwind baitcaster or a conventional trolling reel is ideal. Look for models with a high line capacity, a smooth drag system, and a durable construction that can withstand the rigors of saltwater fishing. The drag is crucial for battling powerful chinook, allowing line to pay out steadily without snapping the leader. When it comes to line, most anglers prefer a strong, low-stretch braided mainline, often in the 30-60 pound test range, for sensitivity and strength. This is typically connected to a fluorocarbon or monofilament leader, usually 30-50 pound test, which offers invisibility in the water and abrasion resistance against the fish’s tough mouth. The length of your leader will vary depending on your rigging preference and local BC Fishing Regulations Explained.
Step-by-Step Guide to Rigging a Herring
Alright, let's get down to the nitty-gritty: the actual rigging. This is where patience and precision pay off. A well-rigged herring can be the difference between a triumphant day and a frustrating one. We’ll walk through selecting the right bait, preparing it, and then rigging it for optimal action.
Choosing the Right Herring Size
The first step in effective herring rigging is selecting the right size of herring for the conditions and the fish you're targeting. Chinook salmon have varying appetites, and sometimes they're particular about their meal size. Herring are typically categorized by size: "Green Label" (small), "Blue Label" (medium), "Red Label" (large), and "Purple Label" (extra-large). For general chinook trolling in BC, Red Label (large) herring are often the most versatile choice, appealing to a wide range of chinook sizes. However, if you're targeting truly monster fish or if the baitfish in the area are particularly large, stepping up to Purple Label might be wise. Conversely, in areas where smaller bait is prevalent or when fishing for finicky summer chinook, Green or Blue Label can be more effective.
Beyond the label size, inspect each individual herring. You want herring that are fresh-frozen, firm to the touch, and have intact scales. Avoid any herring that are soft, mushy, or have freezer burn, as these will not hold up well to trolling and won't produce the desired action. The quality of your bait directly impacts its performance and durability. A good practice is to thaw only what you need for a trip, keeping the rest frozen solid to maintain its integrity.
Brining Your Herring for Durability and Scent
Brining is a non-negotiable step for successful herring fishing. It dramatically improves the bait's durability, helps it retain its natural sheen and scent, and ultimately leads to a better presentation. To brine your herring, start by thawing them completely, but gently. You want them pliable, not stiff or freezer-burned. A good method is to thaw them slowly in cold water, or even in the fridge overnight.
Once thawed, prepare your brine. A simple yet effective brine can be made with non-iodized salt (like pickling salt), cold water, and a touch of borax. The salt hardens the flesh and scales, while the borax helps with firming and preserving the natural colors. Some anglers like to add a few drops of a preferred scent oil, such as anise, or a commercial bait additive found on Amazon, to give their herring an extra edge. Mix these ingredients thoroughly in a container. Place your thawed herring in the brine, ensuring they are fully submerged. Let them soak for at least 6-8 hours, or even overnight in the refrigerator. You'll notice the herring become significantly firmer, almost leathery to the touch. This firm texture is crucial for preventing the bait from washing out prematurely during trolling, ensuring it maintains its enticing roll for longer periods.
The Perfect Pin Rig for Chinook
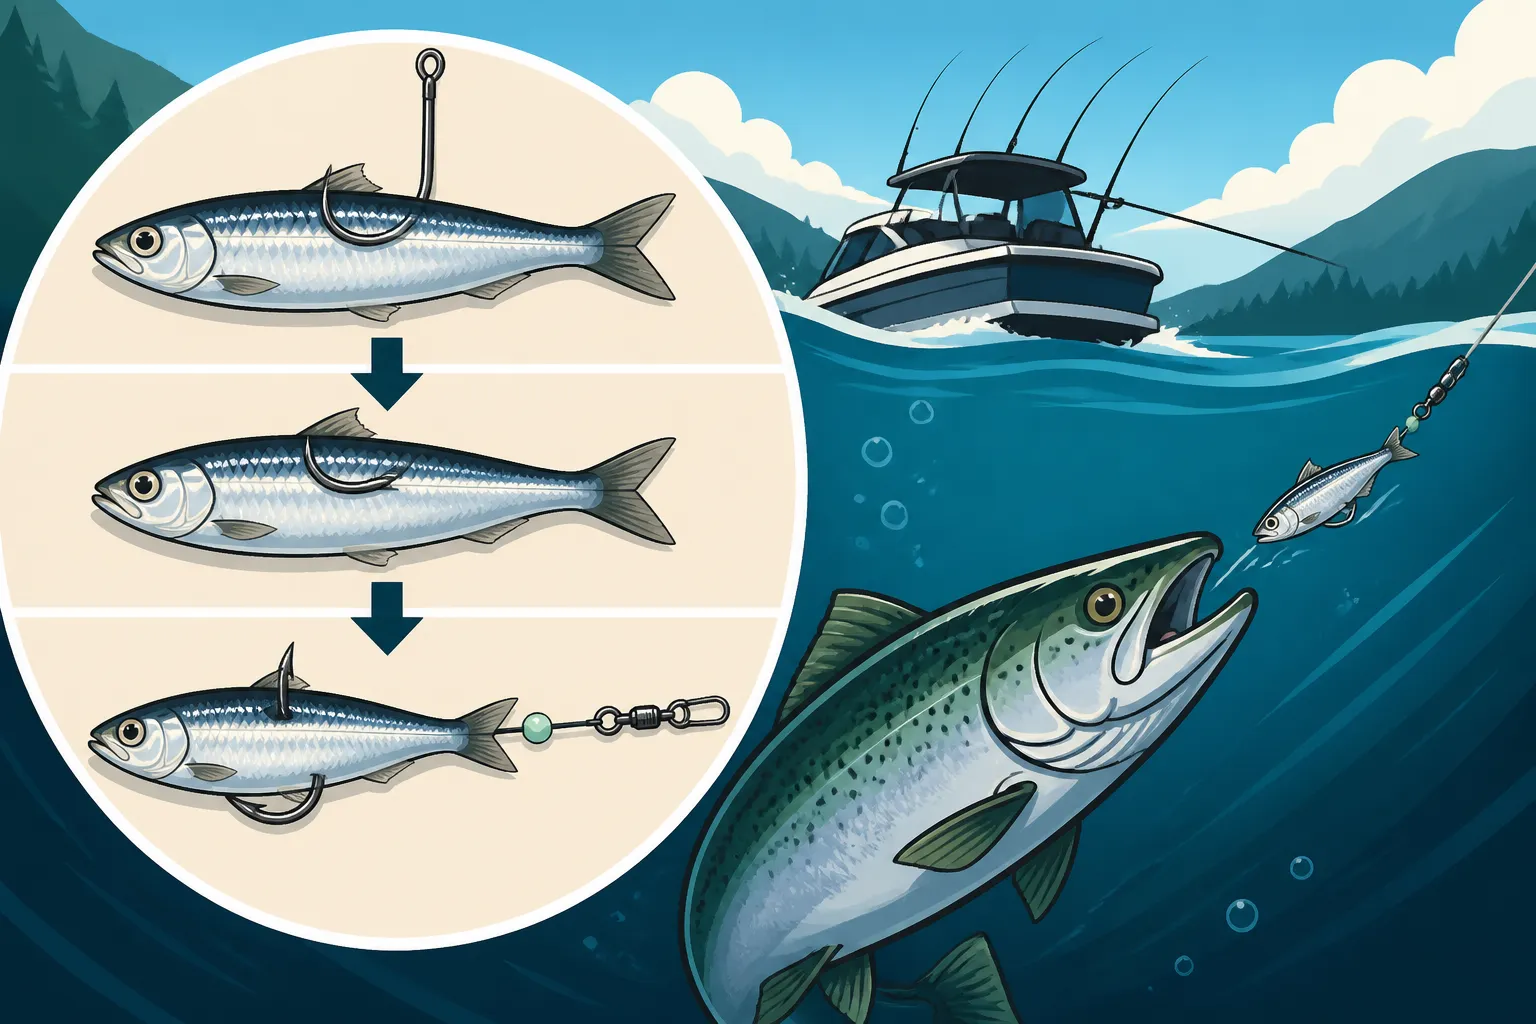
The pin rig is a classic and highly effective method for presenting herring. It’s designed to allow the herring to spin or roll naturally, mimicking a wounded baitfish.
- Preparation: Start with a brined herring. You'll need a herring helmet (also called a 'rotary head'), a two-hook leader setup (usually a tandem hook rig, with the leading hook being a single point and the trailing hook being a treble or a single), and a rigging pin.
- Insert the Pin: The rigging pin, which often comes with the herring helmet, is inserted through the chin of the herring and out through its mouth. This provides a central anchor point.
- Attach the Leader: Thread your leader, with the hooks already tied on, through the herring helmet. The leading hook should rest along the side of the herring, just behind the gill plate, with the point exposed. The trailing hook (often a treble) is then carefully placed into the flank of the herring, usually around the dorsal fin area, ensuring it's not buried too deep.
- Secure the Helmet: Slide the herring helmet over the herring's head, guiding the rigging pin through the designated hole in the helmet. The pin then locks into place, securing the herring firmly within the helmet.
- Adjust for Roll: The key to the pin rig is fine-tuning the helmet's fin or keel. You want a consistent, slow roll that looks natural. Start with a neutral setting, then make small adjustments. If it's not rolling enough, adjust the fin to one side. If it's rolling too fast or erratically, adjust it the other way. You're looking for a gentle, rhythmic spiral that flashes the herring's sides. This might take a bit of practice, but it's essential for success.
A perfectly rigged pin herring will flash and roll enticingly, making it an irresistible target for passing chinook. This method is particularly popular in areas like the Best Salmon Fishing Spots in BC where larger chinook are prevalent.
The Double-Hook Rig for Better Hookups
While the pin rig with a helmet offers exceptional presentation, some anglers prefer a double-hook rig directly through the herring for maximum stealth and hookup potential, especially when fishing for particularly finicky chinook or in very clear water. This method foregoes the helmet, relying solely on the strategic placement of hooks to create the action.
- Materials: You'll need two single hooks, typically sized 4/0 to 6/0, tied in tandem on a fluorocarbon leader. The distance between the hooks should match the length of your herring, allowing the leading hook to sit just behind the gill plate and the trailing hook near the dorsal fin.
- Leading Hook Placement: Take the leading hook and carefully insert it through the herring's lower jaw, then up through the top of its head, ensuring the shank is mostly hidden and the point is exposed. This provides the primary anchor and helps orient the herring.
- Trailing Hook Placement: Now, measure your herring and determine where the trailing hook should sit for optimal coverage. Gently push the point of the trailing hook into the side of the herring, usually in the mid-flank or dorsal area, being careful not to bury the barb deep enough to interfere with the bait's action. The goal is to have both hooks positioned to maximize your chances of a hookup when a chinook strikes.
- Creating the Roll (The Bent Pin Method): This is the trickiest part of the double-hook rig without a helmet. To get the herring to roll, you need to impart a slight curve to its body. Take a small, stiff piece of wire (like a paper clip or a specialized bait pin), or even a very thin, strong plastic tie. Insert it through the nose of the herring and bring it out near the belly, just behind the head. Then, carefully bend the herring into a very subtle 'C' shape. The wire helps hold this curve. This slight bend, combined with your trolling speed, will cause the herring to roll. This method requires a bit more trial and error to get the perfect roll, but when executed correctly, it can be incredibly effective, offering a very natural, unobstructed presentation. Remember, a common mistake is to bend it too much, causing it to spin uncontrollably.
This rig offers a very natural look and feel, and many experienced anglers swear by it for its effectiveness in certain conditions. It's often employed in situations where a more subtle presentation is desired, perhaps in clear freshwater systems or specific tidal areas where chinook are highly pressured.
Trolling Techniques and Presentation
Having a perfectly rigged herring is only half the battle. The other half lies in how you present it to the chinook. Trolling techniques, depth, and speed all play critical roles in maximizing your success. It’s a dynamic dance between boat, bait, and fish.
Achieving the Desired Roll
The "roll" of your herring is everything. As mentioned earlier, a natural, seductive roll mimics a wounded baitfish, making it irresistible to hungry chinook. Once your herring is rigged, whether with a helmet or a double-hook setup, the next step is to test its action right beside the boat. Drop it in the water, ideally while the boat is idling forward, and observe its swim.
A perfect roll is a slow, methodical rotation that flashes the herring’s sides. It should look effortless and continuous, not erratic or corkscrewing. If your herring is spinning too fast, like a propeller, it's often referred to as a "washer," and chinook will typically ignore it. This usually indicates an issue with the rigging – perhaps the pin isn’t centered, the helmet fin is too aggressive, or the bait is too soft. Adjust the helmet’s fin or re-rig the bait until you achieve that perfect, slow roll. This might mean making small, incremental adjustments to the fin or the bend in the bait until it looks just right. Consistency is key here; a bait that rolls perfectly at one speed might require adjustment if you change your trolling pace. Knowing how to Trolling Techniques for BC Lake Trout can also provide insights into varying speeds and presentations, even though we're talking about chinook here, the principle of adjusting for optimal lure action remains.
Varying Depths and Speeds
Chinook salmon are often found at specific depths depending on water temperature, light conditions, and baitfish location. Therefore, varying your trolling depth and speed is crucial to finding where the fish are holding. Downriggers are indispensable tools for presenting your herring at precise depths, allowing you to drop your bait to 50, 100, or even 200 feet deep. Start by scouting the area, looking for bait balls or fish arches on your sonar. If you see activity at 80 feet, set your gear there. Don't be afraid to run multiple lines at different depths to cover the water column effectively.
Trolling speed also dramatically affects your herring’s action. Generally, chinook prefer a slower troll, often between 1.5 to 3.5 miles per hour. This slower speed allows the herring to exhibit that enticing, natural roll. However, there are times when a faster troll (up to 4-5 mph) might trigger a reactionary strike, especially if the fish are aggressively feeding. Conversely, if the bite is slow, slowing down even further might coax a hesitant chinook into biting. Experimentation is key: pay attention to your rod tips for the desired vibration and watch your fish finder. If you're not getting bites, change something – depth, speed, or even the color of your herring helmet. The goal is to present your bait where the chinook are, at a speed that makes it irresistible. This adaptability is critical for success in diverse conditions, whether you are fishing in the Best Salmon Fishing Spots in BC or a less-known local gem.
Common Mistakes and Troubleshooting
Even the most seasoned anglers can run into issues with herring rigging. It's an art, not a precise science, and conditions on the water are constantly changing. Knowing how to identify and rectify common problems can save you a lot of frustration and turn a slow day into a successful one.
Avoiding "Washer" Herring
One of the most common and frustrating problems when trolling herring is the dreaded "washer" effect. This happens when your herring spins uncontrollably and unnaturally, often like a fast-spinning propeller blade, instead of exhibiting a slow, seductive roll. Chinook salmon are highly discerning predators, and a washer herring looks completely artificial and unappealing to them. It's a sure way to ensure your bait is ignored.
Several factors can contribute to a washer herring. The most frequent culprit is improper rigging of the herring itself. If the pin isn’t perfectly centered through the herring's chin and head within the helmet, or if the helmet's fin isn’t adjusted correctly, it will create an imbalance that causes the spin. A soft, unbrined herring is also highly susceptible to washing out quickly; its flesh tears, and it loses its structural integrity. To troubleshoot, first, reel in your bait and visually inspect it. Is the pin centered? Is the herring firmly seated in the helmet? Is the helmet fin angled correctly for a roll? If the herring itself is soft, it might be time to replace it with a fresh, firmer one from your brine cooler. Sometimes, even a slight change in trolling speed can turn a perfect roll into a washer, so always check your bait's action when you adjust your boat speed. A little finesse and patience in rigging can prevent a lot of wasted trolling time.
Dealing with Finicky Chinook
There are days when the chinook salmon just seem finicky. You’ve got perfectly brined herring, expertly rigged, trolling at the right depth and speed, yet the bites just aren’t coming. This is when you need to start troubleshooting and adjusting your tactics to entice those hesitant fish.
First, consider the size and color of your herring. If standard Red Label herring aren't producing, try switching to a smaller Green Label or a larger Purple Label to see if a different meal size triggers a strike. Sometimes, the subtle flash of an unbrined, silvery bait can be the ticket, while other times, a brine with a dye (like blue or green) might make the difference, especially in stained water. Scent is another critical factor. If you haven't already, add a few drops of a powerful scent attractant to your herring. Think of a product you might find on Amazon, perhaps a concentrated fish oil or a specific bait paste. The added scent trail can be the final trigger for a cautious chinook.
Secondly, don't forget to vary your presentation. Instead of a consistent straight troll, try making slow, wide turns. The inside rod will slow down, and the outside rod will speed up, changing the action of your herring at different rates and depths. This sudden change in speed and action can often trigger a strike from following fish. Also, experiment with your leader length; sometimes a longer, more subtle leader is preferred by wary chinook, while other times, a shorter one is more effective. The key is to keep experimenting until you find what the fish want on that particular day. Remember, success often comes down to adaptability and trying something different when the conventional methods aren't working.
Mastering the art of rigging herring for chinook trolling is a journey, not a destination. It takes practice, observation, and a willingness to learn from every moment on the water. But with the right techniques, attention to detail, and a bit of patience, you’ll soon be enjoying the incredible satisfaction of hooking into powerful chinook salmon in the stunning waters of British Columbia. Tight lines, and may your herring always roll true!
Disclaimer
This article is for general informational purposes only and does not constitute professional advice. Laws, prices and regulations vary by location and change over time. Consult a qualified professional for guidance on your specific situation.