Best sonar settings for finding structure on Kootenay Lake
Finding those elusive fish-holding structures in a deep, vast body of water like Kootenay Lake can feel like searching for a needle in a haystack. The lake's unique characteristics, from its incredible depths to its varied bottom topography, make it a true challenge for even seasoned anglers. This guide will walk you through the best sonar settings to optimize your fish finder, helping you to pinpoint productive structure and ultimately increase your chances of a successful day on the water, whether you're targeting those famous Gerrard rainbow trout or schools of kokanee.
Understanding Kootenay Lake's Unique Structure
Kootenay Lake isn't your average shallow fishing pond. It's a massive, deep, and often intimidating body of water that presents specific challenges and rewards for anglers. To truly master your sonar, you first need to appreciate the kind of underwater terrain you'll be scanning.
Deep Water and Fjord-Like Features
One of the most striking features of Kootenay Lake is its immense depth. In many areas, especially the main body of the lake, you're looking at hundreds of feet of water beneath your boat. This isn't a small, easily readable lake; it's more like an inland fjord. This extreme depth means that your sonar unit needs to be powerful enough to penetrate the water column efficiently, and your settings need to be tuned to pick up faint returns from far below. A low-frequency signal, or a dedicated deep-water CHIRP transducer, becomes incredibly important here. Attempting to run only a high-frequency beam in 500 feet of water will result in a lot of empty screen space, leaving you wondering where all the fish and structure have gone. Many anglers often make the mistake of using default settings meant for shallower, warmer lakes, which simply won't cut it when you're exploring the abyssal plains of Kootenay.
Submerged Reefs and Shoals
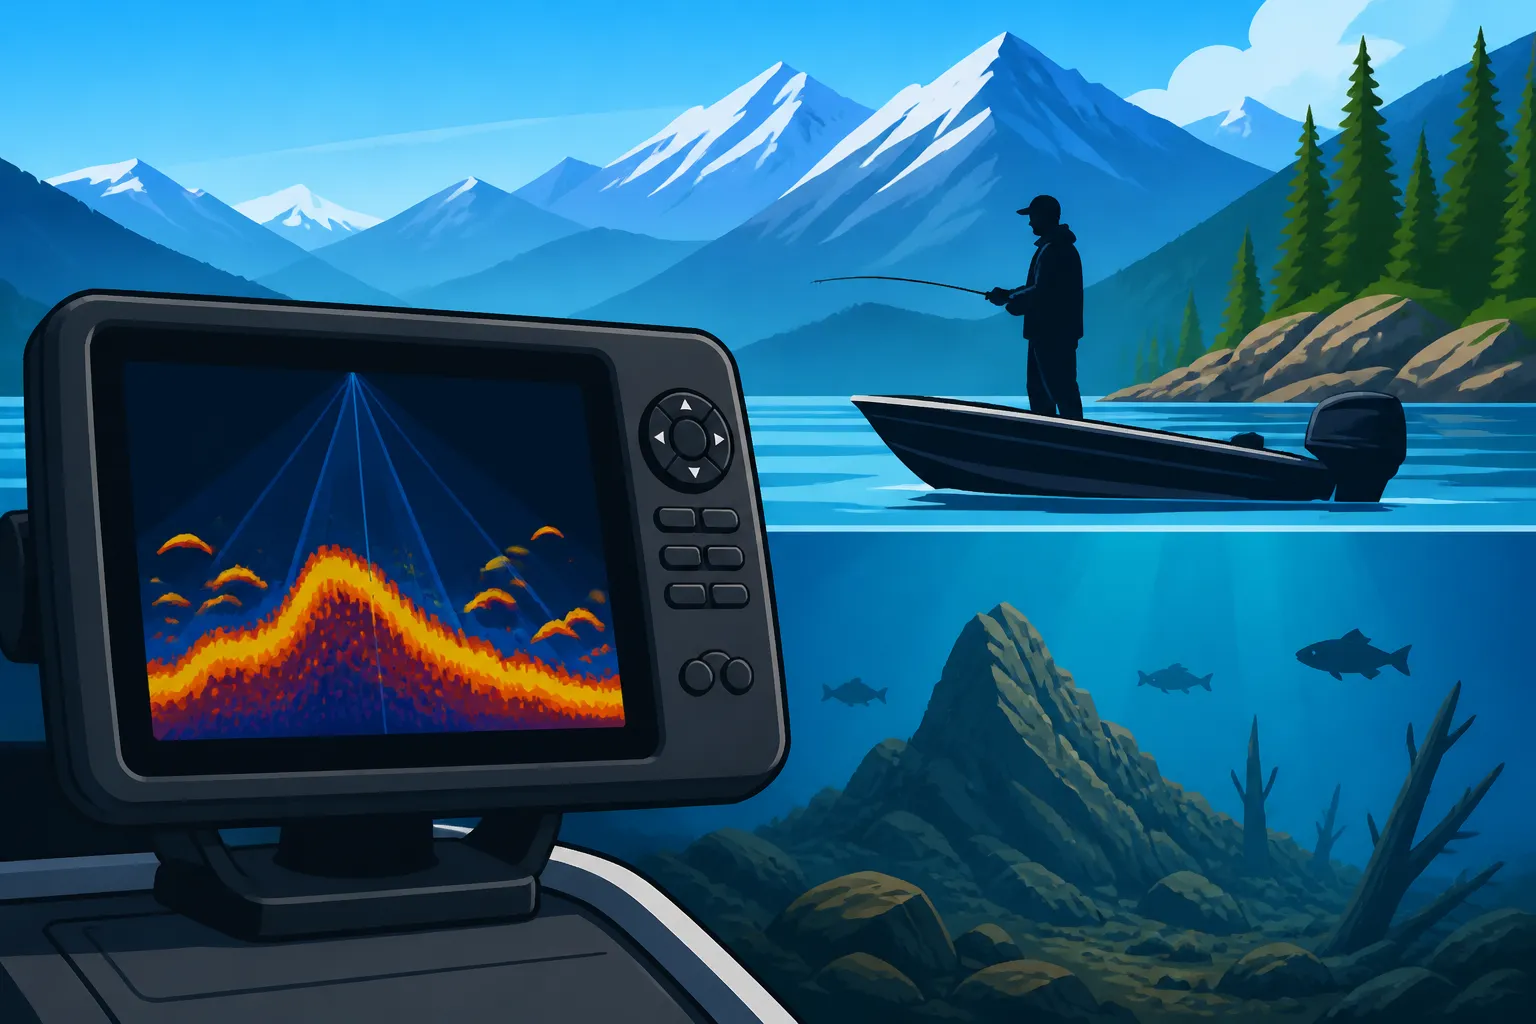
Beneath the often calm surface of Kootenay Lake lie numerous submerged reefs, rock piles, and shoals. These aren't always visible on navigational charts, or their exact contours might be simplified. These hidden underwater mountains and plateaus are absolute magnets for baitfish and, consequently, the predatory fish we're after, like bull trout and rainbow trout. Finding them requires a keen eye on your sonar and the right settings to differentiate them from a smooth, featureless bottom. High-frequency 2D sonar or, even better, DownScan and SideScan imaging, can paint a much clearer picture of these structures. Imagine you're cruising along and suddenly your screen shows a jagged, rocky rise from 200 feet up to 80 feet – that's prime real estate for a lurking Gerrard! Without precise settings, these crucial details might appear as nothing more than a blurred smudge on your screen, making them easy to miss. This is where investing in quality mapping and understanding your sonar's capabilities truly pays off.
Drop-Offs and Ledges
Kootenay Lake is carved by ancient glaciers, resulting in dramatic underwater topography. Steep drop-offs, ledges, and abrupt changes in depth are common, especially around points, islands, and river mouths. These transitional zones are key feeding grounds and ambush points for fish. Fish often hold right on the edge of these changes, moving between deeper, cooler water and shallower, warmer feeding areas. Identifying these subtle (or not-so-subtle) depth changes requires your sonar to accurately display the bottom contour and maintain clarity across varying depths. If your gain is too low, you might miss the subtle transition of a gentle slope. If it's too high, the screen might be cluttered with noise, obscuring the precise line of a sharp drop. Being able to discern a distinct ledge from a gradual decline can be the difference between finding a school of kokanee and just passing over empty water. Mastering the visual interpretation of these contours is a critical skill for Kootenay Lake Fishing Guide.
Essential Sonar Frequencies and Their Applications
Modern sonar units come packed with an array of frequencies and imaging options, each serving a specific purpose. Understanding when and how to use them is paramount for successful fishing on a lake as diverse as Kootenay.
High Frequency 200 kHz and CHIRP High
High-frequency sonar, typically around 200 kHz or using a "High CHIRP" range (e.g., 150-240 kHz), provides excellent detail and target separation in shallower to moderate depths. Think of it as your high-resolution camera lens. When you're fishing shallower bays, working the edges of shoals, or exploring structure in the top 100 feet of the water column, this is your go-to. The narrow beam width of high-frequency sonar gives you a crisp image, allowing you to clearly distinguish individual fish, bait balls, and the intricate details of a rock pile or submerged timber.
However, its downside is penetration; the signal attenuates quickly in deep water. If you're trying to mark fish at 400 feet with only a 200 kHz traditional transducer, you're likely to see very little, if anything. The signal just won't have the power to bounce back effectively. This frequency excels at showing you the fine details of a specific structure you've already located, or for precise jigging over a marked target. It's fantastic for pinpointing the exact location of a school of kokanee when they are suspended at shallower depths, or for seeing individual trout relating to a specific piece of structure. Many anglers use high-frequency for their primary traditional 2D sonar view, especially when fishing for species like Kokanee Fishing in BC.
Low Frequency 50 kHz and CHIRP Low
Conversely, low-frequency sonar, around 50 kHz or "Low CHIRP" (e.g., 28-60 kHz), is your deep-water workhorse. This signal can penetrate much deeper into the water column, making it indispensable for Kootenay Lake's immense depths. While it sacrifices some detail and target separation compared to high frequency, it excels at providing a broader, more generalized view of the bottom and deeper fish arches. Its wider cone angle also covers a larger area, which can be beneficial for initial scouting.
When you're cruising over the deep basins of Kootenay, looking for large schools of baitfish, deep-dwelling Gerrard rainbows, or even those monster bull trout, a 50 kHz or Low CHIRP setting will give you the range you need. You might not see individual fish as clearly defined as with high frequency, but you'll see large arches or clusters indicating fish presence at depth. Many high-end sonar units available on Amazon come with multi-frequency transducers, allowing you to switch between or even simultaneously display both high and low frequencies. This dual-frequency capability is incredibly valuable on a lake like Kootenay, giving you both deep penetration and detailed shallow views. For instance, you might run 50 kHz on one pane of your display to scan the depths while keeping 200 kHz on another pane for detailed target separation as you approach a promising ledge.
DownScan and SideScan Imaging
This is where modern sonar truly shines for structure detection. DownScan imaging (sometimes called ClearVü or StructureScan Down) uses a very narrow, high-frequency beam to create photographic-like images of what's directly beneath your boat. It excels at showing distinct structure like sunken trees, rock piles, and even individual fish suspended tightly to the bottom, with incredible clarity. Imagine seeing a picture of a log laying on the bottom, with a fish clearly visible beside it – that's DownScan. It helps you differentiate between a loose pile of rocks and a solid reef, or a weed bed and a school of bait.
SideScan imaging (often called StructureScan or SideVü) takes this a step further by sending beams out to the sides of your boat, scanning a wide swath of the bottom. This is arguably the most powerful tool for finding new structure on Kootenay Lake. You can cover a huge area, effectively "mowing the lawn" to uncover hidden reefs, ledges, and drop-offs that you might have otherwise missed. When SideScanning, you'll see contours and objects off to the sides, allowing you to mark them as waypoints and then circle back to investigate with your 2D or DownScan sonar. For instance, you could be cruising the edge of a known drop-off, and SideScan might reveal a hidden finger of rock extending out from the main structure that's holding fish. Many anglers looking for the Best deep water structure spots on Kootenay Lake rely heavily on SideScan to explore unseen terrain. Popular units from brands like Humminbird and Lowrance, often found on Amazon, are renowned for their excellent SideScan capabilities.
Optimizing Your Sonar Settings for Structure Detection
Having a high-tech sonar unit is only half the battle; knowing how to fine-tune its settings for the specific conditions of Kootenay Lake is where you unlock its true potential. These adjustments will help you cut through the noise and get a clear picture of what's happening beneath your boat.
Gain and Sensitivity Adjustments
Gain, or sensitivity, is arguably the most critical setting on your sonar. It controls how much the unit amplifies the returned echoes. Too low, and you'll miss faint returns from fish or deep structure. Too high, and your screen will be cluttered with noise, false echoes, and an indistinguishable mess. On Kootenay Lake, with its varying depths and water clarity, you'll be adjusting this frequently.
Start by setting your gain manually. A good starting point is usually to increase it until you start seeing a fair amount of clutter, then back it off slightly until the screen is mostly clear but still showing a distinct bottom. As you move into deeper water, you'll generally need to increase your gain to compensate for the signal's attenuation. Conversely, in shallower areas, you'll often need to decrease it to avoid overwhelming the screen. For example, if you're marking schools of Kokanee Spawning Season in BC in 50 feet of water, your gain will be much lower than when you're searching for deep-dwelling Gerrard rainbows at 200 feet. The goal is to see a crisp bottom reading, clear fish arches (or dots/blobs on imaging sonar), and minimal interference. It's a continuous dance, and the best anglers are always tweaking their gain.
Noise Rejection and Surface Clarity
Sonar signals can be affected by various forms of interference, or "noise." This can come from your boat's engine, other electronic devices, turbulence from your propeller, or even atmospheric conditions. Most sonar units have settings like "Noise Rejection" or "Interference Rejection" to help filter this out. Similarly, "Surface Clarity" or "Surface Noise" settings address the clutter created by air bubbles and turbulence directly beneath your transducer, which can obscure targets in the top few feet of the water column.
On Kootenay Lake, especially when you're running at speed or in choppy conditions, these settings can be very helpful. Experiment with different levels of noise rejection. Start with it on "low" or "auto" and only increase it if you're seeing excessive clutter that isn't fish or structure. Too much noise rejection can filter out actual fish signals, so it's a balance. Surface clarity is particularly useful if you're trying to spot suspended fish or baitfish very close to the surface, which is often where feeding salmonids might be found. By cleaning up the surface clutter, you get a clearer view of the top water column.
Scroll Speed and Color Palette
These two settings might seem cosmetic, but they play a crucial role in how you interpret what your sonar is showing you. Scroll speed dictates how fast the sonar history moves across your screen. A faster scroll speed provides a more real-time view of what's directly beneath you, making it easier to see how fish are reacting to your boat or quickly identify a specific piece of structure as you pass over it. However, it can also compress the history, making smaller details harder to discern.
A slower scroll speed, on the other hand, stretches out the history, allowing you to see more gradual changes in the bottom contour or the behavior of fish over a longer period. For Trolling Techniques for BC Lake Trout, a moderate scroll speed often works best, giving you a good balance of real-time information and historical context. The color palette selection can also make a huge difference. Different palettes emphasize different signal strengths. Some anglers prefer warmer colors (reds, yellows) to represent stronger returns (harder bottom, bigger fish), while others prefer cooler colors (blues, greens). Experiment to find a palette that makes sense to your eye and allows you to easily differentiate between bottom, fish, and structure.
Interpreting Sonar Readings for Fish and Structure
Your sonar is talking to you, but are you listening? Learning to accurately interpret the lines, arches, and shapes on your screen is an art form that takes practice, but it's essential for converting those blips into actual fish in the boat.
Identifying Hard vs. Soft Bottoms
The type of bottom structure is a crucial piece of information for anglers. Fish often prefer specific bottom types for feeding, spawning, or hiding. On your 2D sonar, a hard bottom (like rock, gravel, or packed clay) will typically appear as a thick, intense, and often double echo. The first return is the actual bottom, and the second, fainter return is the echo bouncing off the hard bottom and reflecting back down before returning to the transducer. A soft bottom (like mud or silt) will usually show as a thinner, less intense single line.
DownScan imaging provides an even clearer picture. Hard bottoms will appear brighter and more defined, sometimes showing texture, while soft bottoms will look darker and more uniform. For example, if you're looking for areas where Gerrard Rainbow Trout of Kootenay Lake might be foraging, you might target areas where your sonar shows a distinct, hard, rocky bottom transitioning to a softer, muddier flat. Understanding these differences helps you deduce what kind of habitat you're looking at and whether it's likely to hold the species you're targeting.
Spotting Bait Balls and Target Fish
Baitfish are the foundation of any healthy fishery, and finding them is often the first step to finding predatory fish. On your 2D sonar, bait balls typically appear as dense, amorphous clouds or masses of small dots. Sometimes, you'll even see larger arches (predators) lurking around the edges or directly within these bait balls, indicating a feeding frenzy. Individual fish will usually show up as arches – the classic "fish arch" occurs because the fish enters the sonar cone, is visible for a period, and then leaves, creating a curved return. The shape and intensity of the arch can give clues about the fish's size and how long it stayed in the cone.
With DownScan, bait balls appear as more defined, granular clouds, and individual fish might look like bright, distinct blobs or even small torpedo shapes, especially if they are close to the bottom or structure. SideScan can show schools of bait as large fuzzy patches extending out from the boat. If you see a large, distinct arch on your 2D sonar, or a clear, bright blob on DownScan near a submerged rock pile, that's your cue to slow down, circle back, and get your line in the water. Remember, Kootenay Lake is home to a robust population of kokanee, which form large bait balls, so learning to identify them is key for targeting larger fish. For those interested in How to Catch Rainbow Trout in BC Lakes, understanding these baitfish patterns is crucial.
Understanding Thermoclines
Thermoclines are layers in the water column where the temperature changes rapidly with depth. In deep, stratified lakes like Kootenay, they are incredibly important for fish location, especially during warmer months. Fish, baitfish, and oxygen all tend to congregate around these temperature breaks. On your 2D sonar, a thermocline will often appear as a hazy, diffuse horizontal line or band across the screen. It's not a solid bottom return but a distinct layer where the density of the water changes, causing a subtle reflection of the sonar signal.
Learning to identify thermoclines allows you to target the most productive depths. If you see a prominent thermocline at, say, 70 feet, you know that many fish will likely be holding at or just above that depth, where conditions are optimal. Fishing below a deep, distinct thermocline can often be fruitless as oxygen levels and baitfish presence dwindle. Adjusting your downrigger depths or jigging presentations to match the thermocline depth can dramatically improve your success rate. Pay close attention to these subtle changes in your sonar display; they are critical clues that Kootenay Lake is providing you about where the fish are hiding.
Here's a quick reference table for optimizing your Kootenay Lake sonar:
| Sonar Feature/Setting | Best Use for Kootenay Lake | When to Adjust | What to Look For |
|---|---|---|---|
| High Frequency (200 kHz/CHIRP High) | Detailed views of structure, target separation in shallower (0-100 ft) water. | When focusing on specific targets or shallower shoals. | Crisp fish arches, clear structure details. |
| Low Frequency (50 kHz/CHIRP Low) | Deep water penetration (100-500+ ft), wide area coverage. | When scouting large, deep basins. | Large fish arches at depth, general bottom contours. |
| DownScan/ClearVü | Photo-like images of structure directly below the boat, distinguishing bottom types. | When identifying specific structures or bottom composition. | Detailed sunken logs, clear rock piles, distinct bottom changes. |
| SideScan/SideVü | Scouting wide areas for new, hidden structure off to the sides of the boat. | When searching for new fishing spots or exploring large flats. | Hidden reefs, ledges, channels, and bait balls away from the boat. |
| Gain/Sensitivity | Adjusts signal amplification, crucial for seeing faint returns. | Constantly, as depth and conditions change. | Clear bottom, distinct fish signals, minimal clutter. |
| Noise Rejection | Filters out interference from engine, turbulence, etc. | If screen is excessively cluttered with random lines. | Clean screen, but avoid over-filtering real fish. |
| Scroll Speed | Dictates how fast sonar history moves across the screen. | Faster for real-time tracking, slower for historical context. | Smooth transition of bottom/fish signals. |
| Color Palette | Visual representation of sonar returns. | Experiment to find what's easiest for your eyes. | Good contrast between fish, structure, and water. |
| Thermocline | Identifies temperature stratification. | During warmer months (typically summer/fall). | Hazy horizontal line in the water column; fish often congregate above it. |
Armed with this knowledge and the right sonar settings, you'll be well on your way to deciphering Kootenay Lake's secrets and finding those incredible fish.
Disclaimer
This article is for general informational purposes only and does not constitute professional advice. Laws, prices and regulations vary by location and change over time. Consult a qualified professional for guidance on your specific situation.