Best drift rig for BC steelhead
There's nothing quite like the thrill of feeling that subtle tap-tap on your line, signaling a powerful BC steelhead has inhaled your offering. But let's be real, successfully presenting a bait or lure naturally enough to fool these notoriously finicky fish in British Columbia's diverse and often challenging rivers is an art form. This guide is dedicated to dissecting the best drift rig for BC steelhead, helping you understand the components, how to assemble them, and the techniques to master the drift to increase your hook-up rates on these magnificent fish.
Understanding the BC Steelhead Challenge
Steelhead fishing in British Columbia is not just a pastime; it's a passion, often bordering on an obsession. But it comes with its unique set of challenges. These fish are powerful, elusive, and demand precision in presentation. Trying to tackle BC's wild rivers with a haphazard rig is a recipe for frustration, not success.
The Dynamic Nature of BC Rivers
British Columbia's rivers are incredibly varied, from the powerful, wide flows of the Fraser and Skeena systems to the intimate, boulder-strewn stretches of smaller coastal streams. This means anglers face a constantly changing environment. You might be fishing a deep, slow pool one minute, and then navigating a fast, turbulent riffle the next. Each of these scenarios demands specific adjustments to your drift rig. Strong currents can easily push your gear out of the strike zone or create unnatural drag, while complex bottom structures — think submerged logs, boulders, and gravel beds — are notorious for snagging ill-prepared rigs. The challenge lies in creating a rig that can adapt to these shifts, maintaining bottom contact without constantly getting hung up, and presenting your offering as if it were a natural food item drifting effortlessly downstream.
Steelhead Behavior and Presentation Needs
Steelhead are, by nature, wary predators. They've migrated hundreds, sometimes thousands, of kilometers to reach their spawning grounds, navigating countless obstacles and predators. By the time they enter a river system, they're often not actively feeding but rather reacting to instinct or opportunity. This means they are highly sensitive to anything that looks or feels unnatural. A perfect drift rig mimics the natural movement of a dislodged salmon egg, a nymph, or a small baitfish tumbling freely with the current. Any deviation—a tight line pulling the bait unnaturally, a weight bouncing too aggressively, or a leader too visible—can spook a steelhead instantly. The goal is to make your offering irresistible, presenting it right in their feeding lane with a flawless, drag-free drift that doesn't trigger their innate caution. This is often discussed when considering specific techniques like Drift Fishing for Steelhead in BC Rivers.
Common Frustrations with Poor Rigs
We've all been there: a day on the river where you feel like you're fighting your gear more than the fish. A poorly designed drift rig can lead to a litany of frustrations. The most common one is constant snagging. Losing expensive terminal tackle, re-tying knots with cold, numb fingers, and spooking the entire run with your thrashing efforts can quickly sour a fishing trip. Then there's the missed bites. Sometimes you feel a subtle take, but the fish doesn't commit, likely because the presentation felt off. Other times, the weight system is so clunky that it dampens the subtle strikes of a steelhead, leaving you guessing whether it was a fish or just the bottom. And, of course, an unnatural presentation means fewer bites, plain and simple. If your bait is dragging, swinging, or not getting down to the fish's level, you're missing opportunities. These frustrations highlight why getting your drift rig dialed in is paramount for success.
Components of an Effective BC Steelhead Drift Rig
Building the perfect drift rig for BC steelhead isn't about using the most expensive gear, but rather understanding how each component works together to achieve that elusive natural presentation. Every piece of your setup, from your rod tip to your hook, plays a critical role.
The Rod and Reel Setup
Your rod is essentially your extension to the water, and for drift fishing steelhead, sensitivity is key. A typical setup would be a medium-light to medium-heavy spinning or casting rod, usually between 9 to 11 feet in length. The longer rod helps you mend your line effectively, keeping it off the water and allowing for a longer, drag-free drift. A fast action tip is crucial for detecting those subtle steelhead takes, while a strong backbone ensures you have the power to control and land these powerful fish. For reels, a reliable spinning reel in the 2500-4000 series or a baitcasting reel with a smooth drag system is ideal. You want something that can hold enough line, has a consistent drag, and won't buckle under the strain of a surging steelhead. Brands like Shimano, Daiwa, and Lamiglas are often seen on BC rivers. If you're looking for new gear, you can often find a great selection of rods and reels on Amazon with various price points and reviews to guide your choice.
Mainline and Leader Considerations
The choice of line is paramount. For your mainline, many anglers opt for braided line (e.g., 20-30 lb test) due to its excellent sensitivity and low stretch, which helps detect even the lightest bites. However, some prefer a high-visibility monofilament or fluorocarbon (e.g., 10-15 lb test) for its forgiving stretch and ease of knot tying. The braided line typically requires a long, shock-absorbing leader system.
Your leader is where the real finesse comes in. Fluorocarbon is almost universally preferred for steelhead leaders because it's nearly invisible underwater and incredibly abrasion-resistant—a must when fishing around rocky bottoms. You'll typically use a main leader of 8-12 lb test, tied directly to your mainline via a strong knot like a double uni-knot or an FG knot. Off this main leader, you'll have a dropper leader for your weight and a separate leader for your hook. This multi-leader system is key to a versatile drift rig. The length and breaking strength of these leaders will vary based on water clarity and current, with lighter, longer leaders used in clear, slow water and shorter, heavier ones for murky, fast conditions. Learning about BC Freshwater vs Tidal Waters License, Explained is important before you even hit the water, as rules can vary greatly.
Weighting Systems for the Drift
This is perhaps the most critical component for achieving a natural drift and making contact with the bottom without constant snagging.
- Slinkies: These are small, fabric tubes filled with lead shot, offering a "soft" bottom contact. They're excellent for very snaggy bottoms as they tend to roll over obstructions rather than wedge into them. Slinkies are typically attached to a short dropper line (e.g., 6-10 lb test monofilament) that's lighter than your main leader, so if you do snag, you only lose the weight, not your entire rig.
- Pencil Lead: Thin, cylindrical lead weights (or non-toxic alternatives) are often crimped onto a dropper line or directly onto the main leader. They offer good bottom contact and are excellent for deeper, faster water where you need to get down quickly. Like slinkies, they should be on a lighter dropper line.
- Split Shot: While less common for the primary weight in heavy current, small split shot can be used to fine-tune your drift or for lighter presentations in shallower, slower water. They can also be added above your main weight to help keep your leader down in faster flows.
The key is to use just enough weight to tick the bottom occasionally without dragging or getting constantly snagged. This often means adjusting your weight throughout the day as conditions change. You can find various forms of pencil lead and slinky-making supplies on Amazon to suit your specific needs.
Swivels, Beads, and Stops
These small pieces of terminal tackle are essential for a functional drift rig.
- Barrel Swivels or Crane Swivels: These are used to connect your mainline to your leader, and your main leader to your dropper leader system. They prevent line twist, which can be a nightmare in river currents, and provide a strong connection point. Choose appropriate sizes (e.g., #8 to #12) based on your line strength and target species.
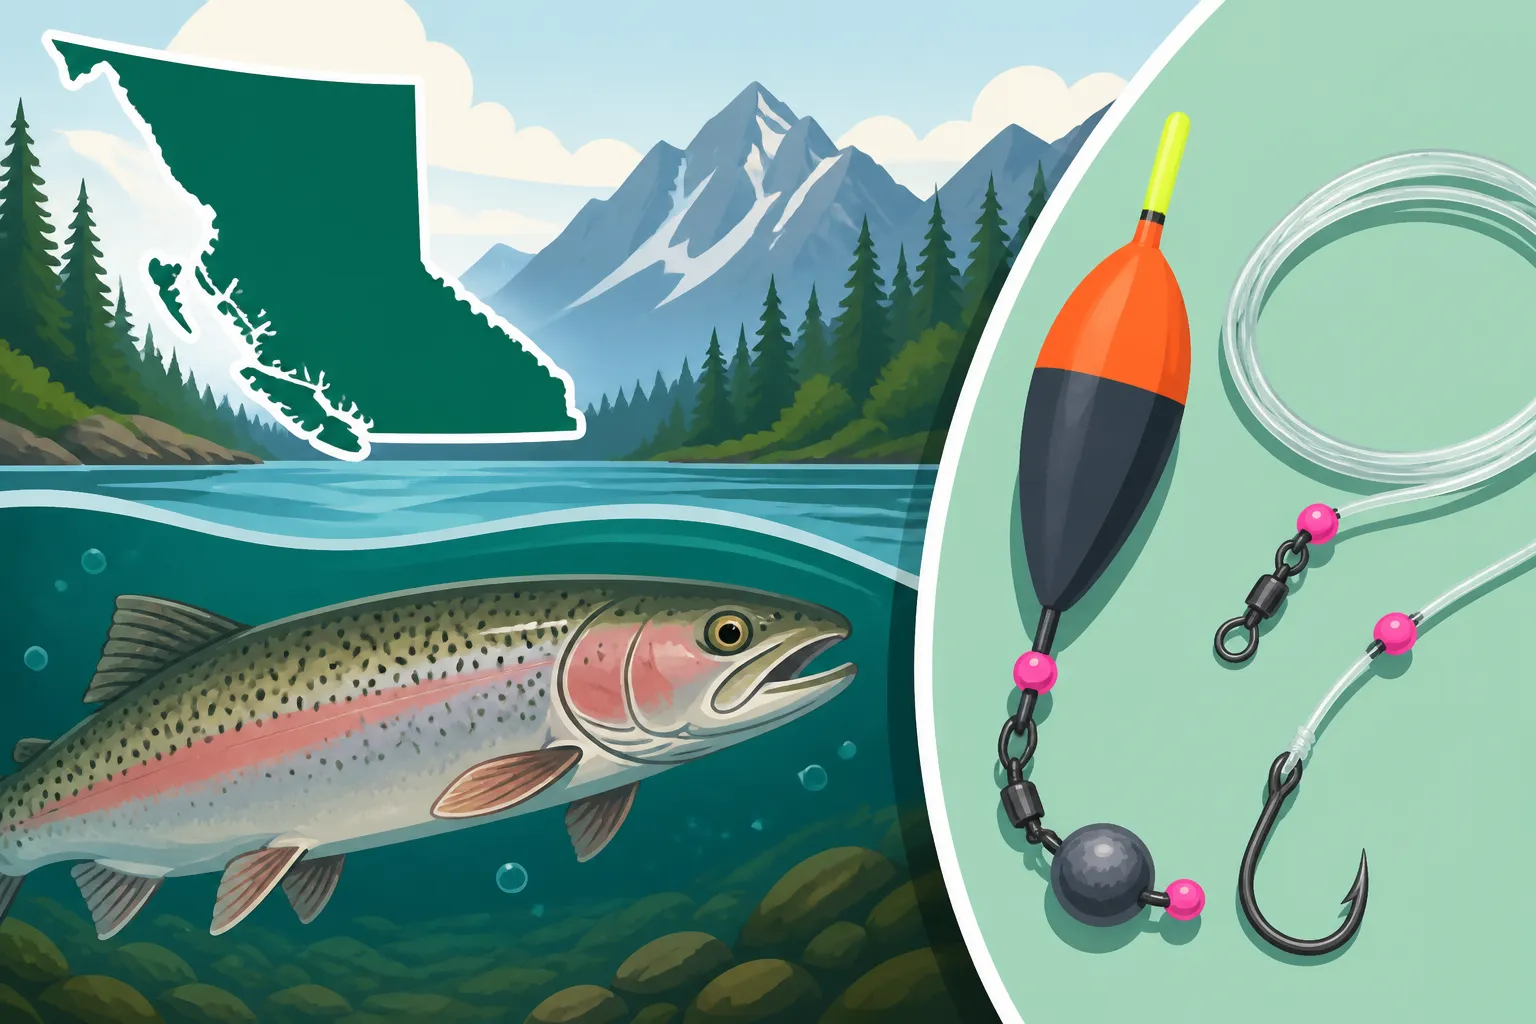
- Beads: Small plastic or glass beads are often used above the swivel connected to your hook leader. They act as a buffer, protecting your knot from the weight's impact and adding a subtle visual attractant. Some anglers also believe they mimic salmon eggs.
- Rubber Stops or Bobber Stops: These tiny rubber pieces are used to adjust the depth of your float (if float fishing) or to secure other components on your line. While less central to a pure bottom-bouncing drift rig, they're critical for any variation involving a float.
Hook Selection and Bait/Lure Attachment
The hook is where it all comes together. For steelhead, single barbless hooks are the standard in many BC regulations (always check the BC Fishing Regulations Explained for specific rivers!). Sizes typically range from #1 to 2/0, depending on your bait and target fish size.
- Bait Hooks: If using natural bait like roe, worms, or prawns, a strong, sharp, wide-gap bait hook is ideal. Many anglers employ an "egg loop" knot to secure bait firmly, preventing it from washing off in the current and ensuring a natural presentation.
- Lure Hooks: For small jigs, plastics, or artificial eggs, a sharp, light-wire hook designed for plastics often works best. Ensure the hook matches the size of your lure for optimal action.
- Tandem Rigs: Some anglers use a two-hook "tandem" rig, especially with longer baits like worms, to increase hook-up rates. Again, always ensure compliance with local regulations on the number of hooks allowed.
The goal is to have your bait or lure presented enticingly, swinging freely on a short leader, just behind your weight, making it the first thing a steelhead sees and feels.
Assembling the Ultimate BC Steelhead Drift Rig (Step-by-Step)
Now that we've gone over the individual components, let's put it all together. There are many variations, but this basic setup is tried and true for many BC steelhead rivers.
The Mainline Connection
First things first, let's get your mainline connected to your leader system.
- Tie on your main leader: Take about 3-5 feet of 8-12 lb fluorocarbon leader. Connect this directly to your mainline using a strong, reliable knot. A double uni-knot is a common choice, offering good strength and a relatively small profile. If you're using braided mainline, some anglers prefer an FG knot for an even stronger, smoother connection that passes through rod guides easily.
- Add a swivel: About 18-24 inches up from the end of your main fluorocarbon leader, tie in a small barrel or crane swivel (e.g., #8 or #10). This swivel will be the anchor point for your weight dropper and your hook leader. It also helps prevent line twist, especially when fishing in currents or with presentations that might spin. Ensure your knots are cinched down tight and trimmed neatly to avoid snags.
Building the Weight System
This is where you'll be making most of your adjustments on the water.
- Attach the dropper line: From one eye of the swivel you just tied in, tie a short section of lighter monofilament line, usually 6-10 lb test, about 6-12 inches long. This is your "sacrificial" dropper line for the weight. The idea is that if your weight snags, this lighter line will break before your main leader, saving the rest of your rig.
- Affix your weight:
- For Slinkies: Thread the end of your dropper line through the fabric tube of the slinky, then tie a loop knot or an overhand knot to secure the slinky. The slinky should hang freely.
- For Pencil Lead: Crimp your chosen length of pencil lead onto the end of your dropper line. Ensure it's secure but doesn't damage the line excessively. You might use small crimp sleeves for a cleaner attachment.
- For Split Shot: While less common as a primary weight, if you're using split shot, you'd typically crimp them directly onto the dropper line. However, a cleaner drift is usually achieved with a single, heavier weight.
- Adjusting Weight: Always carry a variety of weights. Too little weight, and your offering won't get to the fish; too much, and you'll be snagging constantly and missing subtle bites. The goal is to feel your weight just ticking the bottom every now and then, indicating a proper drift. This often means switching weights throughout the day, especially if you move to different sections of the river or if the water level or speed changes.
Leader and Hook Setup
This is the final, crucial step in completing your steelhead drift rig.
- Attach the hook leader: From the other eye of the swivel (the one not holding the weight dropper), tie another piece of fluorocarbon leader. This is your hook leader, and it should typically be 12-24 inches long, also in the 8-12 lb test range, matching your main leader or slightly lighter.
- Add a bead (optional but recommended): Before tying on your hook, thread a small plastic or glass bead onto your hook leader. This bead sits just above your hook knot and can protect the knot from the weight's constant bumping, while also adding a bit of attraction.
- Tie on your hook: Finally, tie your chosen steelhead hook (single, barbless, #1 to 2/0) to the end of your hook leader. If you're using bait, consider an egg loop knot to secure your roe or other offerings firmly. This knot creates a small loop above the hook eye that you can thread your bait through, holding it securely.
Optimizing for Different Conditions
A "best" drift rig is really a versatile rig that can be quickly adapted.
- Fast, Deep Water: You'll need more weight, so opt for heavier pencil lead or larger slinkies. Keep your hook leader slightly shorter (12-18 inches) to ensure your bait stays close to the bottom and in the strike zone. Your mainline might be heavier braided line for better sensitivity through the current. These are often the conditions encountered when Drift Fishing for Steelhead in BC Rivers.
- Slow, Clear Water: Lighten your weight considerably, perhaps using smaller slinkies or just a few carefully placed split shot. Lengthen your hook leader (up to 24 inches or more) and potentially drop to a lighter fluorocarbon (6-8 lb test) for a more natural, subtle presentation. Fish will have more time to inspect your offering, so stealth is key. These conditions are perfect for using Best Techniques for Low Clear Water Steelhead.
- Murky Water / High Water: In these conditions, visibility is low, so fish are relying more on scent and vibration. You might stick with slightly heavier leaders as fish aren't as spooky. Consider using brightly colored baits or scent-enhanced offerings. The increased current often means more weight. In some cases, a longer rod might be helpful here to keep more line out of the turbulent water and manage your drift. These are the times to employ Best Techniques for High Water Spring Conditions.
| Component | Fast/Deep Water | Slow/Clear Water | Snaggy Bottom |
|---|---|---|---|
| Weight Type | Heavy Pencil Lead, Large Slinkies | Small Slinkies, Minimal Split Shot | Slinkies (less snagging), breakaway dropper line |
| Weight Size | 1/2 oz to 1 oz+ (as needed) | 1/8 oz to 1/4 oz | Matched to current, but on light dropper |
| Hook Leader | Shorter (12-18 inches), 10-12 lb Fluorocarbon | Longer (18-24+ inches), 6-8 lb Fluorocarbon | Standard length, ensure knot strength |
| Main Leader | 10-12 lb Fluorocarbon | 8-10 lb Fluorocarbon | 10-12 lb Fluorocarbon for abrasion resistance |
| Bait/Lure | Larger profile, scent-enhanced, bright colors | Natural look, subtle action, natural colors | Durable, weedless if possible, easy to re-rig |
| Presentation | Aggressive bounce, quick retrieves between drifts | Subtle tick, long drag-free drifts | Focus on feeling bottom, quick rod lifts |
Drift Rig Mastery: Tips for Success on BC Rivers
Having the perfectly assembled drift rig is only half the battle. To truly master steelhead fishing, you need to develop the skills to effectively present that rig and react when a fish finally decides to bite.
Reading the Water
Understanding where steelhead hold in a river is fundamental to effective drift fishing. Steelhead will typically be found in "holding lies" – spots where they can rest out of the main current while still having access to moving water that brings food (or your bait!).
- Seams: Look for areas where fast water meets slow water. Steelhead will often sit just inside the slower current, waiting for food to drift by in the faster lane.
- Tailouts: The shallower, faster water at the end of a deeper pool is a prime location. Fish often stack up here before moving into the next pool or upstream.
- Pools: Deep, slower pools offer refuge and rest. Fish will often hold near the head or tail of the pool, or around any structure within it.
- Riffles: The broken, bubbly water of a riffle can hide steelhead, especially if there are deeper pockets or boulders offering cover.
- Structure: Submerged logs, large boulders, undercut banks, and gravel bars all provide cover and current breaks where steelhead will lie in wait. Learning to identify these spots will significantly improve your chances. This skill is also crucial when considering How to Fish a River for Chinook Salmon, as many salmon species use similar holding patterns.
Casting and Mending for a Natural Drift
The key to drift fishing is achieving a "drag-free" drift, meaning your bait moves at the exact same speed as the current.
- Positioning: Always try to position yourself upstream and slightly across from where you expect the fish to be. This allows your drift to come down to them naturally.
- Casting: Make an upstream quartering cast, aiming to land your rig a bit beyond your target zone. This gives your weight time to sink to the bottom before it reaches the fish.
- Mending: As your line drifts downstream, the current will inevitably create a "belly" in your line, causing your bait to drag unnaturally. To combat this, you need to "mend" your line. This involves quickly lifting your rod tip and flipping the upstream portion of your line back upstream, putting slack back into the system and allowing your bait to continue its natural drift. Practice this constantly – it's a game-changer! Maintaining a consistent, drag-free drift is perhaps the most challenging, yet most rewarding, skill in steelhead fishing. Check out more details on Wading Techniques for BC Steelhead Rivers to ensure you're positioning yourself correctly.
Detecting Bites and Setting the Hook
Steelhead bites can be incredibly subtle, especially in cold water or strong currents. It's rarely a violent tug.
- Visual Cues: Watch your line where it enters the water. Any hesitation, sudden stop, or unnatural movement could indicate a bite. If you're using a float, any dip, stop, or drag is a signal.
- Feel: With braided line, you'll feel subtle taps or a sudden increase in weight. It often feels like your weight is bouncing off a larger rock, but it's much softer. Trust your instincts! If something feels even slightly off, assume it's a fish.
- Setting the Hook: When you detect a bite, don't hesitate. Lift your rod tip sharply and firmly upstream. Don't sweep sideways; a straight, upward set will drive the hook home effectively. Steelhead have tough mouths, so a good hookset is crucial. Be prepared for a strong run immediately after the set!
Snag Prevention and Recovery
Snags are an inevitable part of drift fishing in BC rivers, but you can minimize them and improve your recovery success.
- Proper Weighting: As mentioned, use just enough weight. Too much weight means you're constantly stuck.
- Maintain Contact: Always try to feel your weight ticking the bottom. If you stop feeling it, your rig might be hanging up.
- The "Rod Tip Tap": If you feel a momentary snag, quickly lift your rod tip high and give it a sharp, quick tap downwards. This can sometimes free your weight from a crevice.
- The "Bow and Walk": If you're truly stuck, point your rod tip directly at the snag, then walk upstream, letting the current put pressure on the line. Sometimes, the current will pull the weight free in reverse.
- Breakaway Dropper: This is why we use a lighter test line for our weight dropper. If all else fails, pull steadily until that lighter line breaks, saving your main leader, swivel, and hook. You'll quickly re-tie just the weight dropper and get back to fishing. Remember that rivers like the Skeena are known for their runs. Knowing the Steelhead Runs on BC's North Coast Rivers can help you anticipate good spots where snags might be more prevalent.
Mastering the drift rig for BC steelhead is a journey, not a destination. It requires patience, adaptability, and a willingness to learn from every cast. But when you finally feel that powerful take and bring a chrome-bright steelhead to hand, you'll know all the effort was worth it.
Disclaimer
This article is for general informational purposes only and does not constitute professional advice. Laws, prices and regulations vary by location and change over time. Consult a qualified professional for guidance on your specific situation.